|
Tutorials/3DStudioMax/Nurbs Surface by: D3MONIO
1. Go to "file/reset" and answer yes.
2.
Click the top viewport, and then "Min/Max Toggle"
3.
Under "Shapes", choose "Circle" Then press "Create".
4. Still Under "Keyboard entry" rollout, set coordinates to 0,0,5 and set radius to 65.
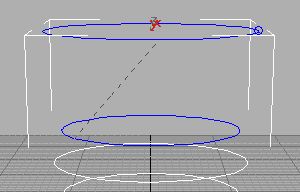
Now repeat "step 4" with these setting (REMEMBER TO PRESS "Create" EACH TIME). Coordinates: 0,0,10 Radius: 60 Coordinates: 0,0,12 Radius: 50 Coordinates: 0,0,20 Radius: 55 Coordinates: 0,0,80 Radius: 65 Coordinates: 0,0,140 Radius: 50 Coordinates: 0,0,160 Radius: 60 Coordinates: 0,0,180 Radius: 50 Coordinates: 0,0,280 Radius: 65
5.
Click "Min/Max Toggle" Now you should have something like this:
6.
Right-Click the topmost circle and click "Convert to NURBS"
7.
Select the topmost circle if it is not and under "Modify"
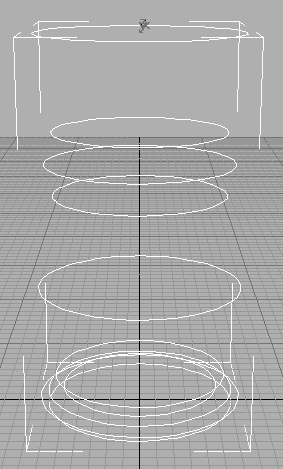
8. Click all the circles in the scene to attach them. Now you should be here:
8.
Right-Click on "Perspective" in the Perspective viewport
and click "Configure"
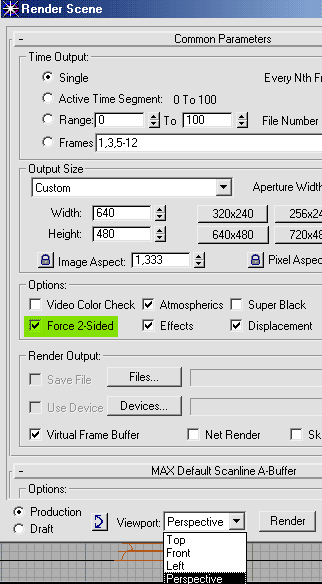
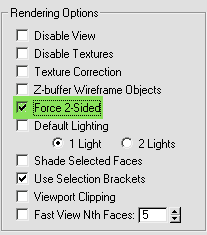
9. In the appeared window, under "Rendering Method", in the "Rendering Option" section, check "Force 2-Sided".
10.
Under "Modify"
11.
In the "NURBS" window click "Create U Loft Surface"
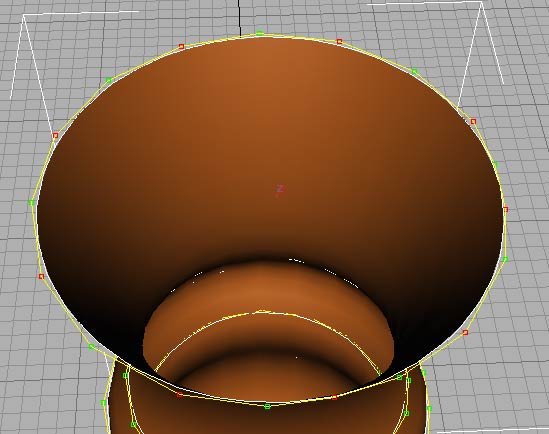
12. Move the cursor on the topmost circle till it turns blue and then click it. Now move the cursor to the 2nd circle and click it.
When you finished right-click on an empty part of the viewport. You should have a simple vase like this one below:
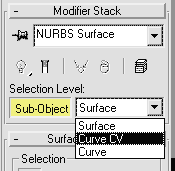
13.
Under "Modify", press "Sub-Object" button and
then "Curve CV" Now the control points are visible.
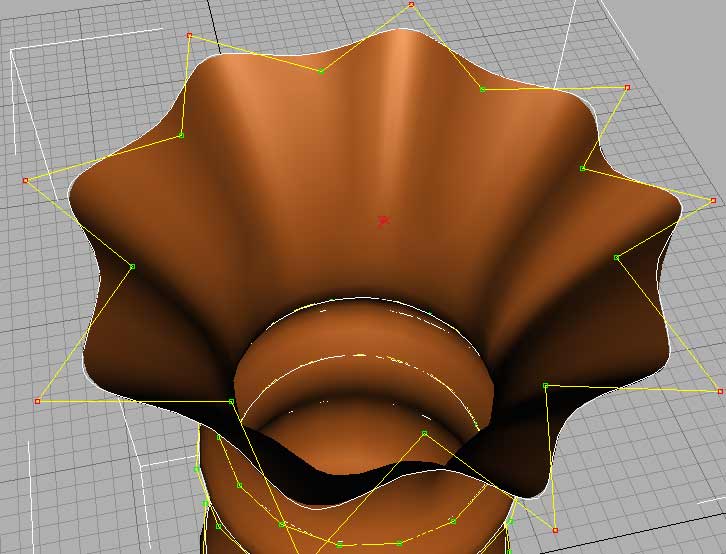
What we are gonna do now is creating a wavy effect to the top part of the vase. But the control points of the circle we have to modify are odd and we have to add one more to make them even.
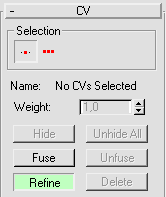
14.
Under "CV", press "Refine"
15. Move the cursor on the topmost circle and click it. It adds a new control point.
16.
Press "Pan"
17. Move the cursor on the perspective viewport and press "Alt" button of the keyboard. Move the visual till you can easily see the control points of the topmost circle.
18.
Under "Main Toolbar", press "Select Object" Click on a control point of the topmost circle. Then, by holding "Ctrl" button of the keyboard select the others control points as showed below:
19.
Under "Main Toolbar", first left-click then right-click
"Select and Uniform Scale"
In the window appeared, under Offset: World, set the percent number like you want. Ive personally set it to 150%.
20.
Under "Main Toolbar", first left-click then right-click
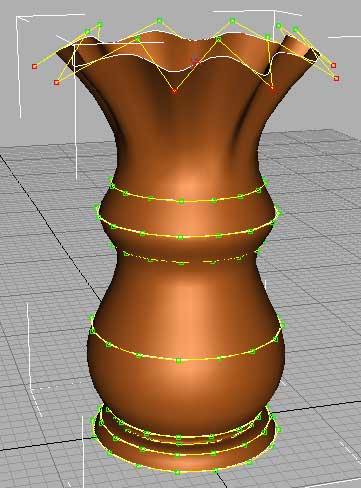
"Select and Move" I hope you are here:
21. Go to "Rendering/Render" and select Viewport "Perspective" and in the "Options" section select "Force 2-Sided".
22. Press the "Render" button.
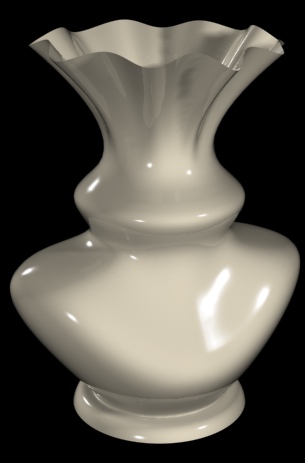
Now you know how to create a vase. Its just up to yr fantasy! :) I've moved other control points, applied textures and placed lights... Here's how mine ended up:
By: D3MONIO Copyright ® Crazysun ART. All rights reserved |
 Then press "Create".
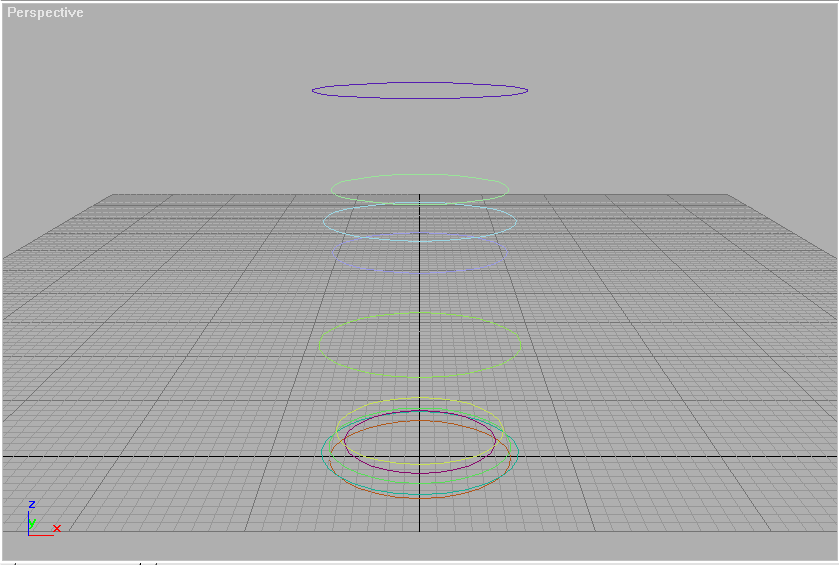
 .
. Then deselect "Attach" button by pressing it.
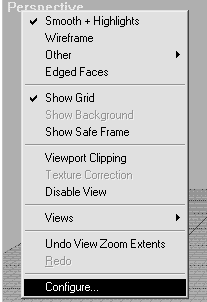 .
. Then press "Ok".
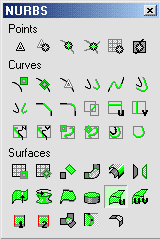
 Then click on the 3rd circle and go on till you have clicked all
the circles.
Then click on the 3rd circle and go on till you have clicked all
the circles.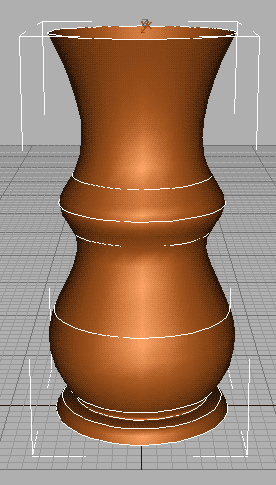
 .
. .
.